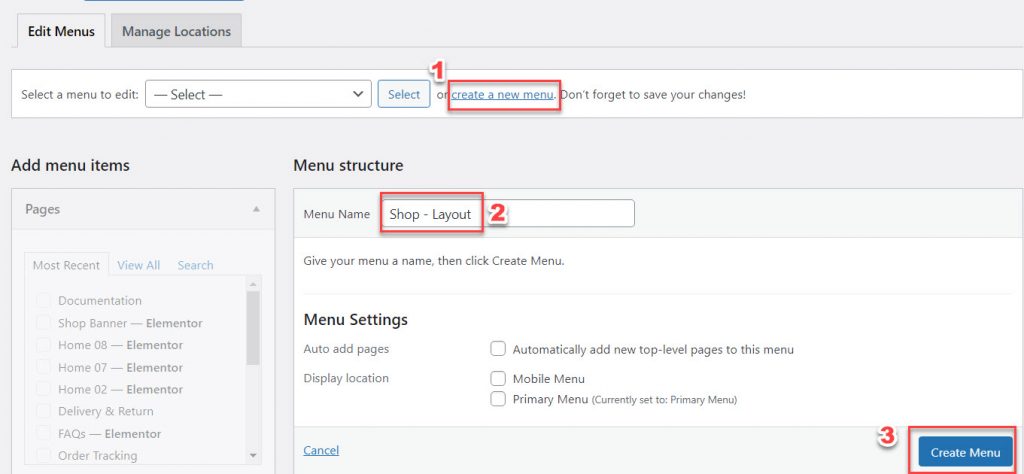
1. Negative to Appearance > Menus > Create a new menu > Enter the name
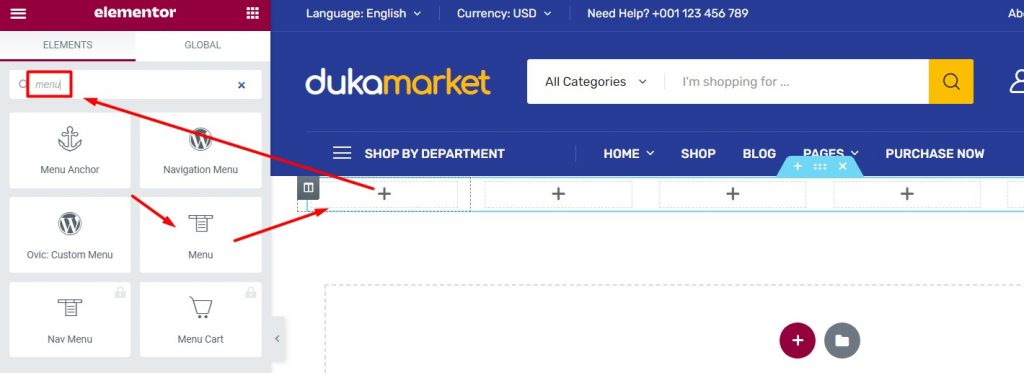
2. From the left tabs, you can select Custom Links to build the menu items:

Note: You also can use the menu items in the Product categories tab
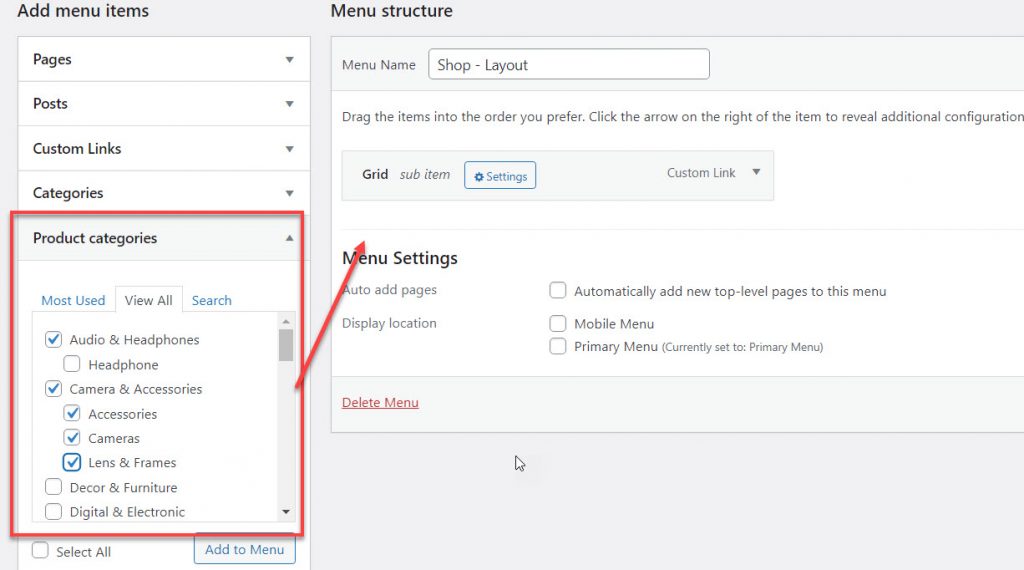
You can create a few menu items like this to make sure that these menu items will be listed when you hover on the main menu item.
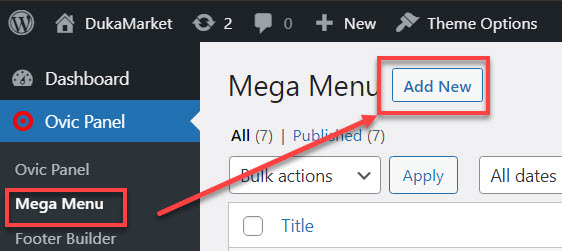
3. Go to Ovic Panel > Mega menu then create a new mega menu. Put a title for this mega menu > then click Edit with Elementor. For example:

4. click here to add a new section. you should calculate how many menu items will be shown so that select the right items:


5. Use shortcode Inner section and Menu to build
– Add title and select the Menu you have created above:
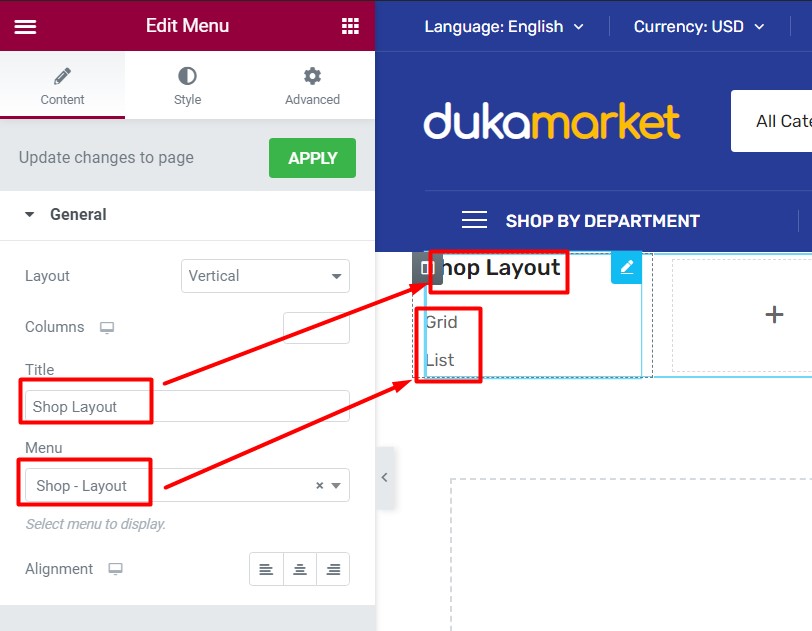
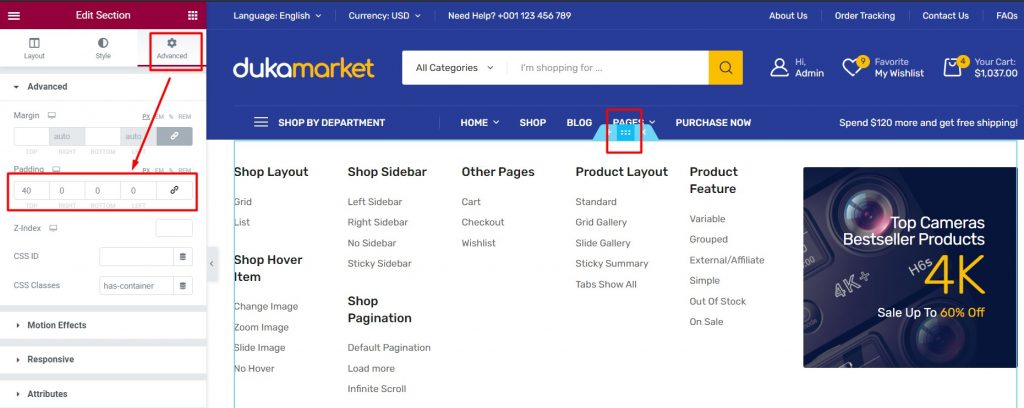
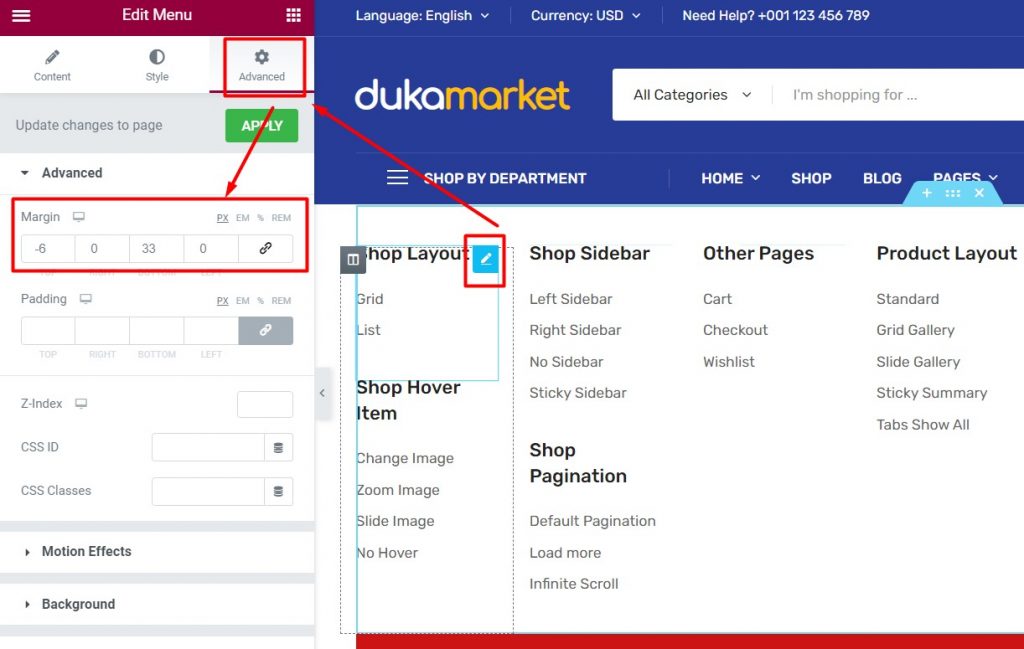
Here will be the margin and padding of the Menu block so that this can display properly:
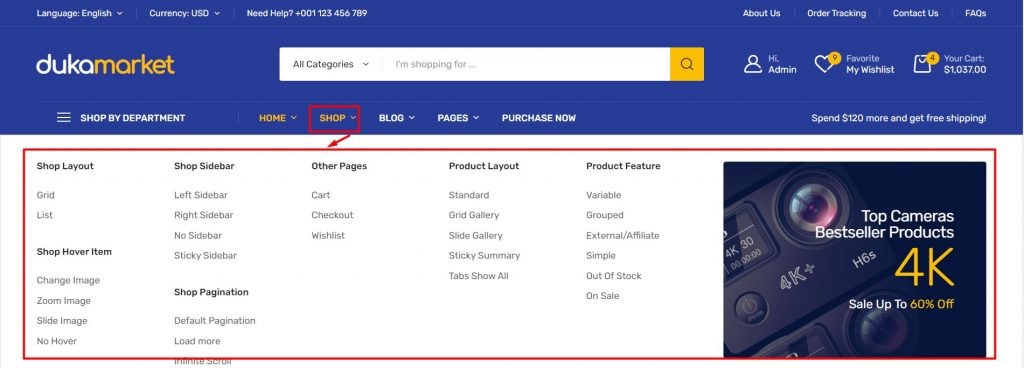
6. Then, select the position you want to add this menu into. We select to add this for menu item: SHOP in Primary Menu. Please select Primary, click on the Settings button of menu item SHOP
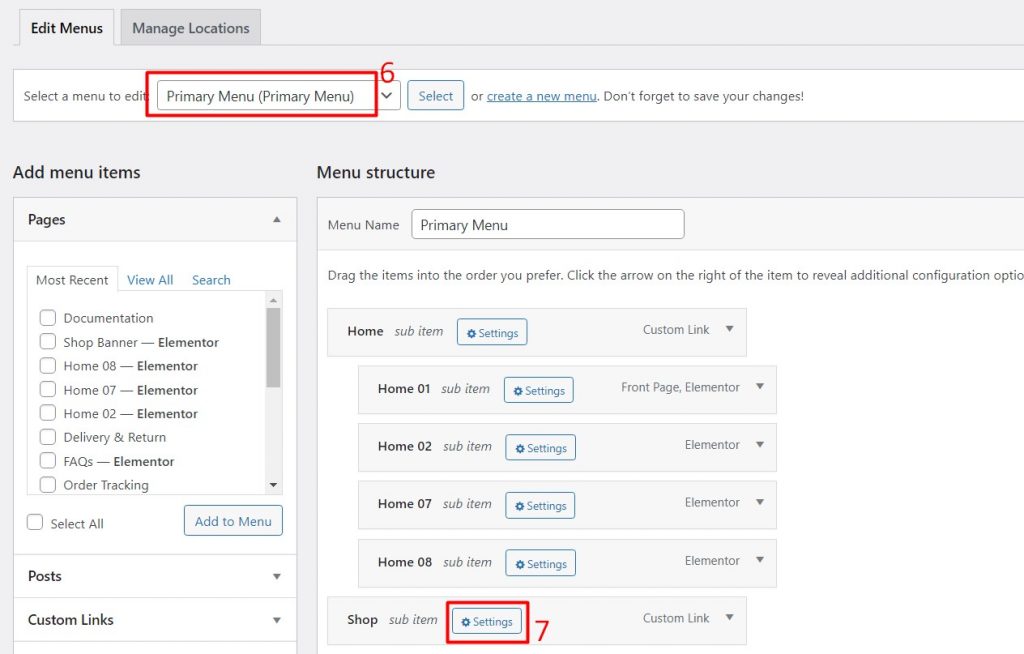
7. Inside, you see 3 tabs:
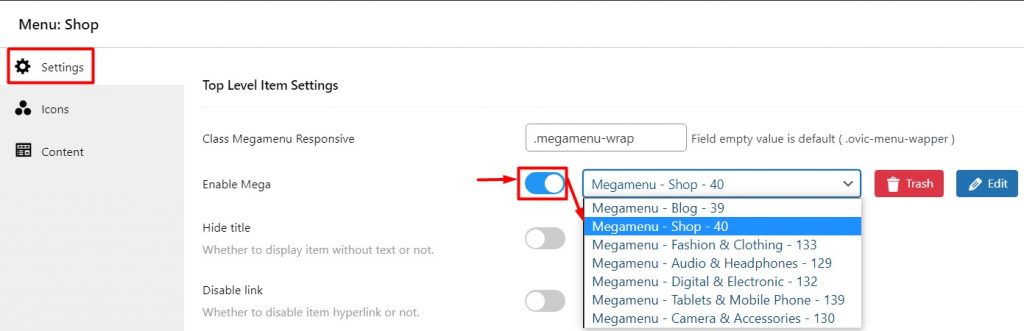
7.1. Settings:
– Class Megamenu Responsive:
Add this text so that the mega menu item will show wiper
.megamenu-wrap

– Enable Mega and select the Megamenu you have created in No.3 above
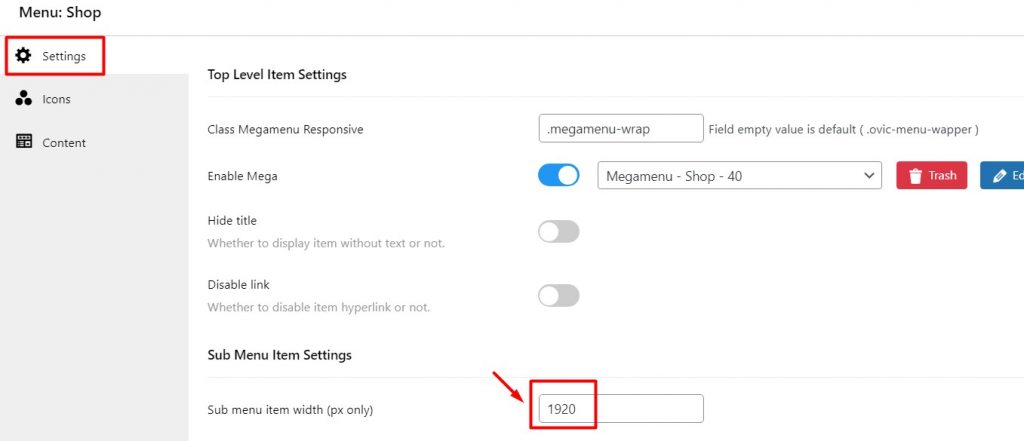
– Set width:
7.2. Icons: Use the available icons
![]()
7.3. Content: Click on the LOAD EDITOR button then you will see the menu you have built above

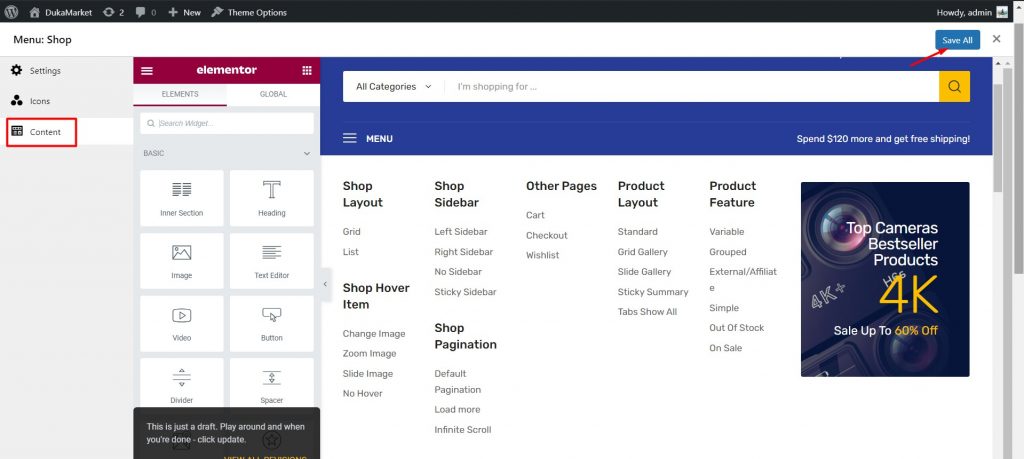
Then, please save again all your settings. The mega menu will show like this